


Artikel: Step by step exfoliation method for glowing skin
Step by step exfoliation method for glowing skin
TL;DR:
- Exfoliation, when done correctly, improves skin texture, brightness, and serum absorption, but improper technique causes damage.
- Key factors include understanding your skin type, patch testing products, applying chemical exfoliants on dry skin, and avoiding layering potent actives.
- Consistent, gentle exfoliation combined with proper sun protection over weeks yields noticeable skin improvements and prevents barrier damage.
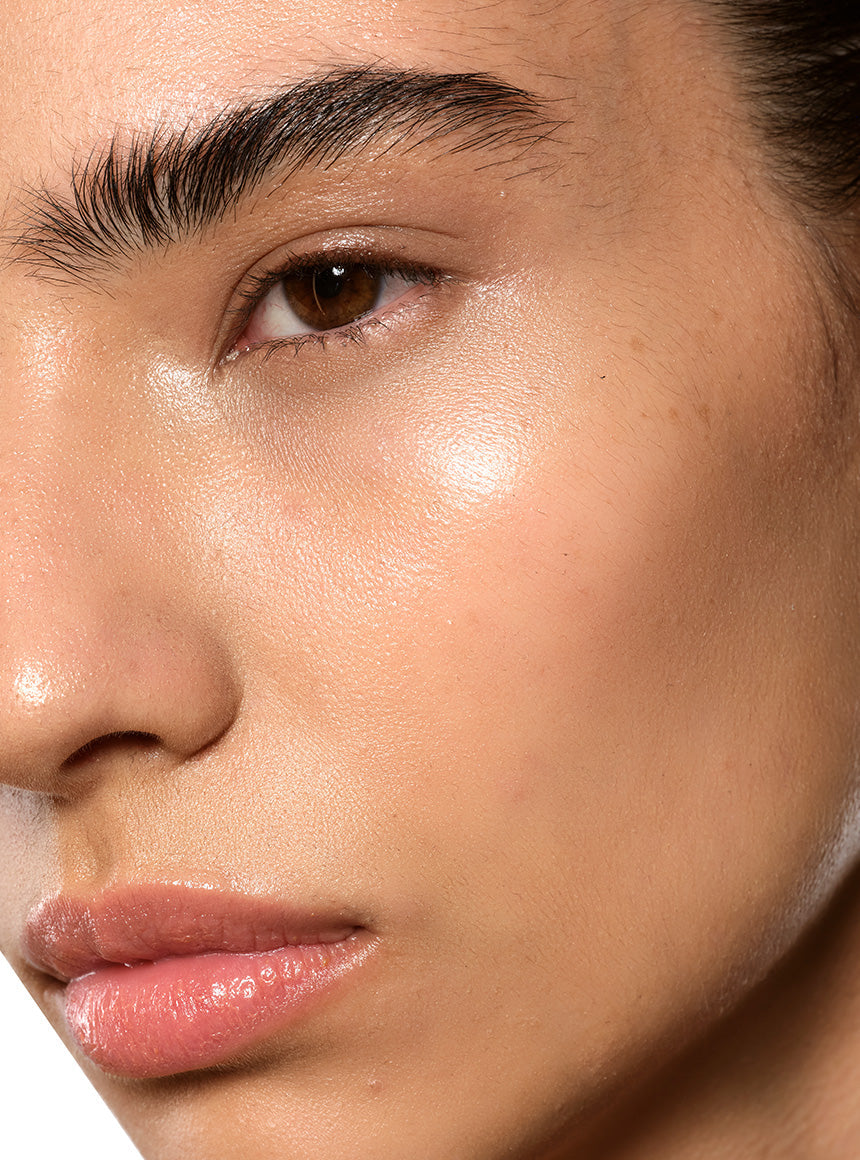
Exfoliation is one of the most misunderstood steps in any skincare routine. Done correctly, a step by step exfoliation method can visibly refine skin texture, brighten a dull complexion, and help your serums absorb far more effectively. Done poorly, it causes redness, a compromised skin barrier, and in some cases, long-lasting pigmentation damage. The difference between those two outcomes almost always comes down to preparation, technique, and consistency rather than the product itself. This guide covers everything you need to know to exfoliate safely and intelligently, whatever your skin type.
Table of Contents
- Key takeaways
- Prerequisites: tools and products you need first
- The step by step exfoliation method: from cleanse to rinse
- Building your exfoliation schedule and avoiding errors
- What to expect and how to troubleshoot
- My take on exfoliation: what experience actually teaches you
- Curated exfoliation products from Them-ethod
- FAQ
Key takeaways
| Point | Details |
|---|---|
| Skin type determines frequency | Sensitive skin exfoliates once weekly; oily skin can manage up to four times weekly without damage. |
| Patch test before full application | Apply any new exfoliant to a small area for two to three days before using it all over the face. |
| Apply chemical exfoliants on dry skin | Damp skin increases acid absorption, raising the risk of sensitivity and irritation significantly. |
| Avoid layering potent actives | Never combine exfoliating acids with retinol or Vitamin C in the same routine to protect your skin barrier. |
| SPF is non-negotiable post-exfoliation | Daily broad-spectrum SPF 30 or higher is mandatory after exfoliating to prevent UV-induced pigmentation. |
Prerequisites: tools and products you need first
Before you start any exfoliation process guide, understanding your skin type is the single most important step. It determines which exfoliant category to use, how often to apply it, and what level of pressure or concentration your skin can safely handle. Getting this wrong is precisely why so many people experience persistent irritation after exfoliating.
There are three main categories of exfoliation to know:
- Physical exfoliation uses manual friction via scrubs, cloths, or brushes to slough away dead skin cells. It is effective but requires a light hand. Facial scrubs account for 59% of the global body scrub market, and despite this popularity, overuse frequently causes microtears in the skin’s surface.
- Chemical exfoliation uses alpha hydroxy acids (AHAs such as glycolic or lactic acid) or beta hydroxy acids (BHAs such as salicylic acid) to dissolve the bonds between dead skin cells without any friction.
- Enzyme exfoliation uses fruit-derived enzymes, typically papain from papaya or bromelain from pineapple, to gently digest dead skin proteins. It is the most suitable option for reactive and sensitive skin types.
| Skin type | Recommended exfoliant | Avoid |
|---|---|---|
| Sensitive | Enzyme or lactic acid | Physical scrubs, high-strength AHAs |
| Normal | AHA, gentle physical | Excessive scrubbing |
| Oily / acne-prone | BHA (salicylic acid) | Harsh physical tools |
| Mature | Lactic acid, enzyme | Granular scrubs |
| Darker skin tones | Enzyme or low-strength AHA | Aggressive chemical peels |
You will also need a gentle cleanser, a non-irritating toner or essence, a hydrating serum or moisturiser, and a broad-spectrum SPF 30 or higher. These are not optional extras. They are part of the stepwise exfoliation procedure from start to finish.
Pro Tip: Always patch test new products on your inner arm or behind your ear for two to three days before applying them to your face. This one habit prevents the majority of avoidable reactions.
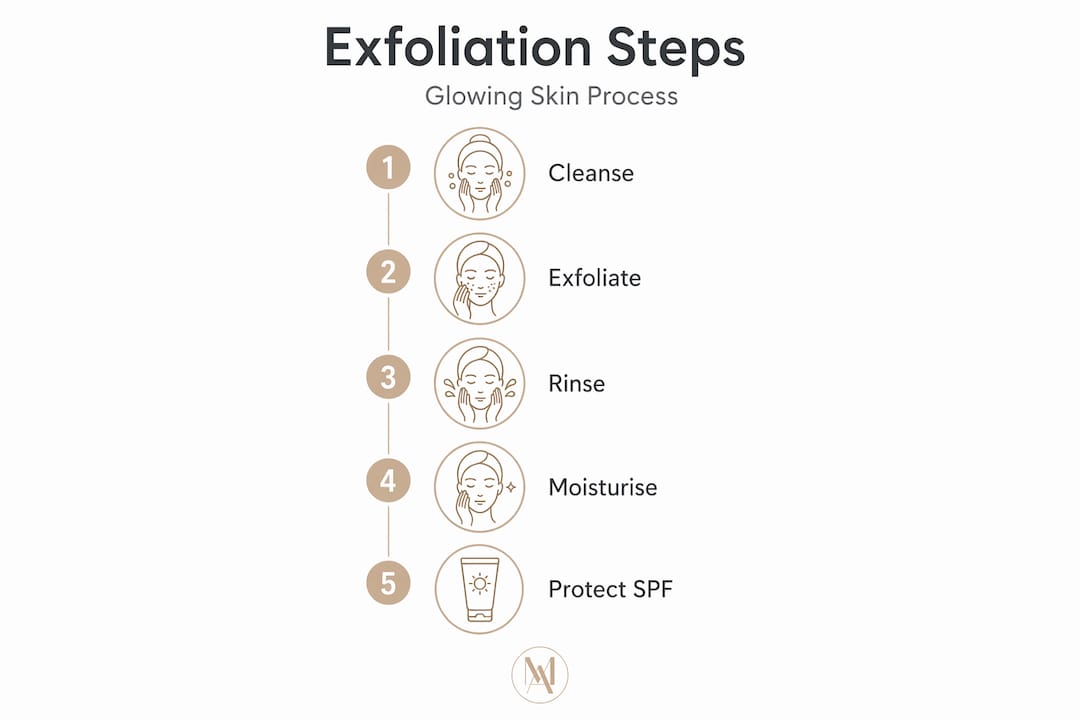
The step by step exfoliation method: from cleanse to rinse
This is the section most guides rush through or summarise too broadly. We are giving you the full picture so you can execute each stage with confidence.
-
Remove all makeup and SPF with a double cleanse. Use an oil-based cleanser or micellar water as your first step to dissolve sunscreen, makeup, and surface sebum. Follow with a gentle water-based cleanser to clear the residue. Your skin must be genuinely clean before any exfoliant touches it. Applying a scrub or acid over SPF or makeup dramatically reduces efficacy and can cause uneven absorption.
-
Pat your skin dry fully before applying chemical exfoliants. This is one of the most frequently overlooked DIY exfoliation steps. Chemical exfoliants applied on dry skin offer far more controlled absorption, reducing the likelihood of sensitivity. Damp skin allows acids to penetrate faster than intended.
-
Apply your chosen exfoliant correctly.
- Physical exfoliant: Dispense a small amount onto damp fingertips. Using very light pressure, work in small circular motions across the forehead, cheeks, and chin for no more than 30 to 60 seconds. More time and more pressure do not equal better results. They equal inflammation.
- Chemical exfoliant: Apply a thin, even layer across the face using a cotton pad or clean fingertips. Do not rub it in. Allow it to sit on the skin for the time specified by the product (typically two to ten minutes). Do not rinse unless the product specifically instructs you to.
- Enzyme exfoliant: Apply to clean, slightly damp skin and leave for five to ten minutes. Enzymes are gentle by nature but still require careful timing, particularly on thin or reactive skin.
-
Avoid the eye area, lips, and any active breakouts. The skin around the eyes is significantly thinner than facial skin and absorbs product much faster. Exfoliating over active spots does not accelerate healing. It spreads bacteria and triggers inflammation.
-
Rinse thoroughly with lukewarm water if your product requires rinsing. Hot water increases redness and strips the skin barrier immediately post-exfoliation. Lukewarm is the correct temperature here.
-
Apply hydration immediately. After rinsing, while the skin is still slightly damp, press a hydrating serum (hyaluronic acid is ideal at this stage) gently into the skin. Follow with your regular moisturiser to lock in that hydration. A freshly exfoliated surface absorbs actives more efficiently, so this is the moment to use your most results-driven products.
Never layer exfoliating acids with other potent actives like retinol or Vitamin C in the same routine. The ‘One-Active-Per-Night’ rule is the single most effective way to prevent skin barrier damage, chemical burns, and long-term sensitivity.
Pro Tip: If you are new to exfoliation techniques, start with the lowest available concentration of your chosen acid and work upwards only when your skin has adjusted over several weeks. Patience here pays off considerably.
Building your exfoliation schedule and avoiding errors

Frequency is where most people make their biggest mistakes. More exfoliation does not equal faster results. It strips the skin’s natural lipid barrier and causes a cycle of dryness, breakouts, and reactive oiliness that can take weeks to resolve.
Exfoliation frequency should be tailored to your skin type with the following as a reliable starting framework:
- Sensitive skin: Once per week, preferably with an enzyme exfoliant
- Normal skin: Two to three times per week, rotating chemical and gentle physical if desired
- Oily or acne-prone skin: Three to four times per week, focusing on BHAs
- Beginners of all skin types: Once per week for the first two to three weeks regardless of skin type, to allow the skin to adjust
Common mistakes to stop immediately:
- Scrubbing with physical exfoliants daily, which risks microtears and chronic inflammation
- Using two different exfoliating products on the same day in the belief that doubling up doubles results
- Skipping SPF the morning after exfoliating, when UV sensitivity is at its highest
- Exfoliating during a flare-up of eczema, rosacea, or broken skin
Pro Tip: Keep a simple skincare note on your phone. Log your exfoliation days, any reactions, and how your skin looks the following morning. After four weeks, you will have a clear picture of your skin’s ideal frequency.
You can also explore chemical peel options as a step up from at-home exfoliation when your skin has adapted and you are looking for a more significant reset.
What to expect and how to troubleshoot
Most people notice an improvement in skin texture and clarity within two to four weeks of following a consistent, gentle exfoliation routine. Radiance typically arrives first, followed by a visible reduction in congestion and enlarged pores. Uneven skin tone takes longer, often six to eight weeks, to show meaningful change.
| Concern | Likely cause | Solution |
|---|---|---|
| Redness and tightness | Over-exfoliation or wrong product strength | Stop for one to two weeks; focus on barrier repair with ceramides and niacinamide |
| Breakouts post-exfoliation | Purging vs. irritation; BHA pulling impurities | Reduce frequency; check you are not layering actives |
| Persistent dryness | Moisture step missing or incomplete | Add hyaluronic acid immediately after exfoliating; increase occlusives at night |
| Post-inflammatory hyperpigmentation | Exfoliation-triggered irritation, especially in darker tones | Swap to enzyme exfoliation; consider a targeted hyperpigmentation treatment |
Individuals with darker skin tones need extra caution when exfoliating because even minor irritation can trigger post-inflammatory hyperpigmentation. Lower concentrations, lower frequency, and enzyme-based products are the safest starting point. If you see darkening appear after exfoliating, dial back immediately and allow the skin barrier to fully recover before reintroducing any acid.
Daily SPF 30 or higher is non-negotiable every single morning following exfoliation, no exceptions. Exfoliation removes the top layer of dead cells, which are your skin’s first line of UV defence. Skipping this step actively undoes the benefits you are working towards and risks pigmentation settling permanently.
If you experience persistent redness, burning, or visible skin barrier damage that does not improve within two weeks of stopping exfoliation, seek professional advice. This is not a sign of failure. It is smart skin management.
My take on exfoliation: what experience actually teaches you
I have worked closely with clients across a genuinely wide spectrum of skin types and concerns, and the pattern I see most consistently is this: the people who achieve the best skin are rarely the ones doing the most. They are the ones doing the right things persistently.
In my experience, the temptation to over-exfoliate is strongest precisely when the skin is looking its worst. When a client has congested, dull, or uneven skin, the instinct is to scrub harder and more often. That instinct is almost always wrong. What those skin types need is a measured, structured approach where the barrier is respected first and stimulated second.
I have also seen skin concerns specific to darker skin tones handled poorly far too often, usually because the advice given was written with lighter skin types in mind. Enzyme exfoliants and low-percentage lactic acid are genuinely transformative for these skin types when applied with the right frequency and the right follow-up care.
For mature skin, the shift from physical to chemical or enzyme exfoliants is not optional. It is a clinical reality. Thinner, less elastic skin does not recover from aggressive scrubbing the way younger skin does. Lactic acid at a low percentage is my consistent recommendation here.
The most useful thing I can tell you is to listen to your skin rather than your calendar. If it looks irritated on your scheduled exfoliation night, skip it. That single habit, knowing when not to exfoliate, separates a good routine from a great one.
— Jess
Curated exfoliation products from Them-ethod
At Them-ethod, we have spent considerable time selecting products that perform consistently across different skin types and concerns, not just those that sound impressive on a label. For those managing acne-prone or congested skin alongside exfoliation, the PCA Clearskin acne treatment serum works particularly well as a complement, helping to manage breakouts without disrupting the skin barrier you are working to maintain. For broader exfoliation needs, the NEOSTRATA product range covers everything from gentle daily AHA formulations to targeted treatments for uneven texture and pigmentation. Each product is clinician-selected and suitable for use within the routines described in this guide. If you are unsure where to begin, a virtual skin consultation with our team will help you identify exactly the right starting point.
FAQ
How often should a beginner exfoliate?
Beginners should exfoliate once per week for the first two to three weeks regardless of skin type, allowing the skin to adjust before increasing frequency.
Can I use a physical scrub and an acid on the same day?
No. Using two exfoliating methods on the same day significantly increases the risk of skin barrier damage, redness, and sensitisation. Choose one method per session.
What is the best exfoliation method for sensitive skin?
Enzyme exfoliants or low-strength lactic acid are the best exfoliation method for sensitive skin, as they work without friction and penetrate gently without the risk of microtears.
Do I need SPF after exfoliating?
Yes. Exfoliation increases UV sensitivity by removing the outermost skin layer, making broad-spectrum SPF 30 or higher an absolute daily requirement the morning after exfoliating.
How do I know if I am over-exfoliating?
Signs of over-exfoliation include persistent redness, tightness, flaking, increased breakouts, and a shiny yet rough texture. If these appear, stop all exfoliation for one to two weeks and focus entirely on barrier repair with ceramide-rich moisturisers.

